


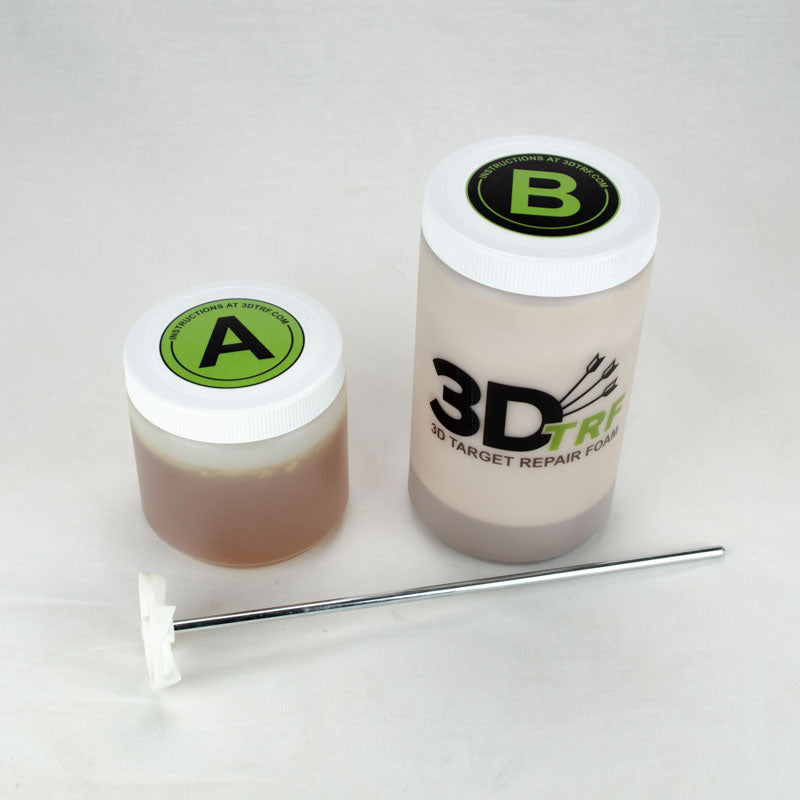
Individual Kit
(Due to an increased cost on everything from materials to shipping rather than raising our prices we are no longer including a free paint mixer with individual kits)
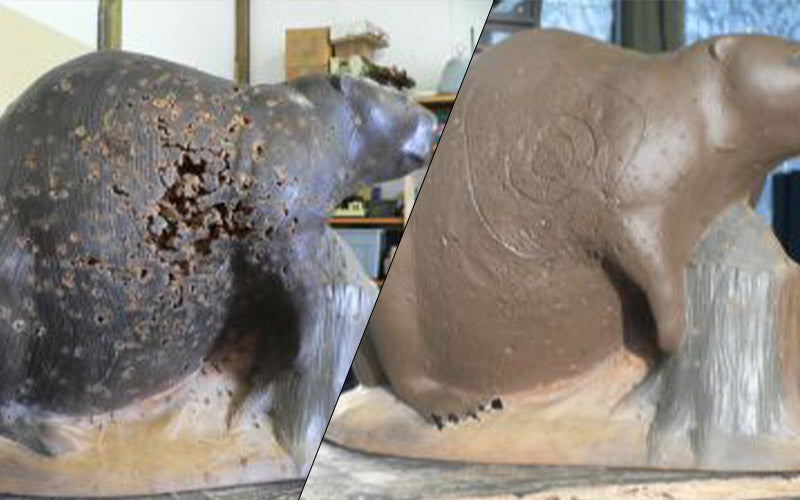
Save money by not only repairing your targets but upgrading them:
- Outlast OEM by 2x
- Self Healing
- Easy Arrow Pull
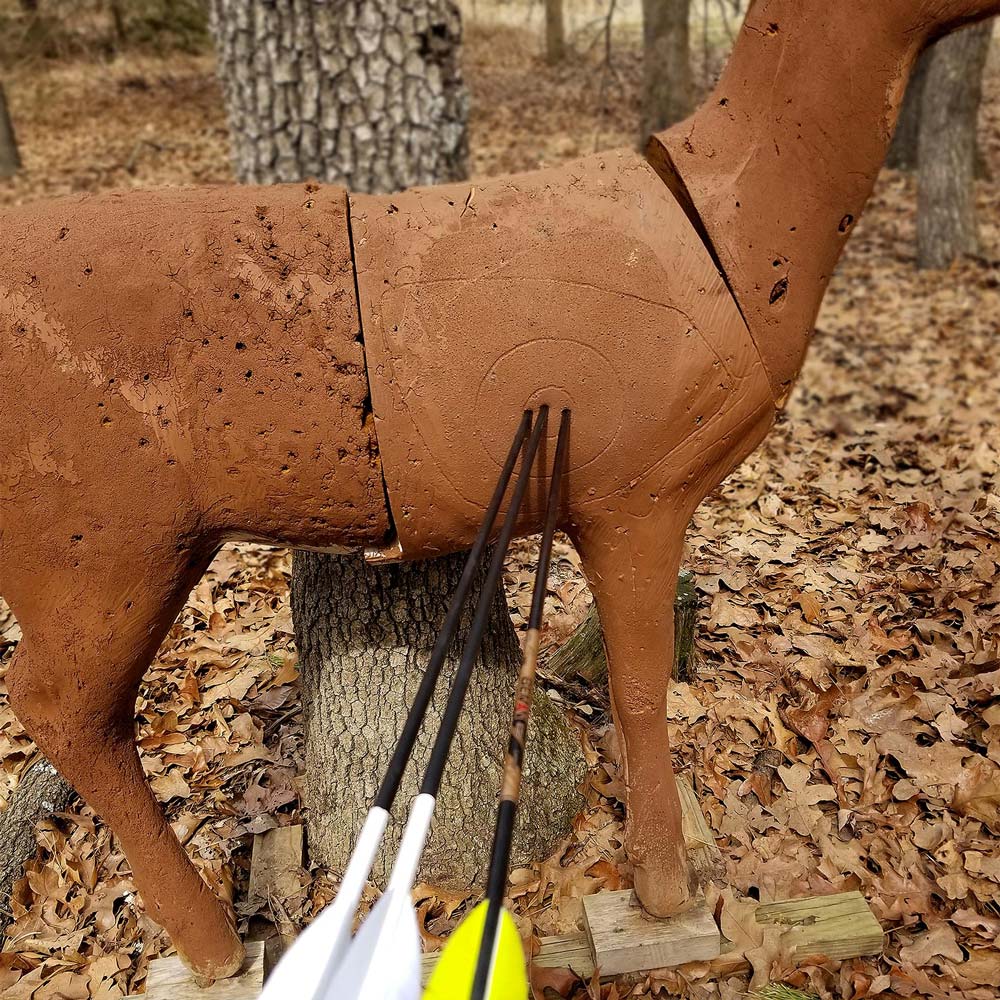
Our Individual Kit is a single use, premeasured option that is enough material to repair a medium size deer shot out on both sides. When combined achieve 1 gallon of finished foam. Each kit comes with detailed instructions on how to repair a target from start to finish.
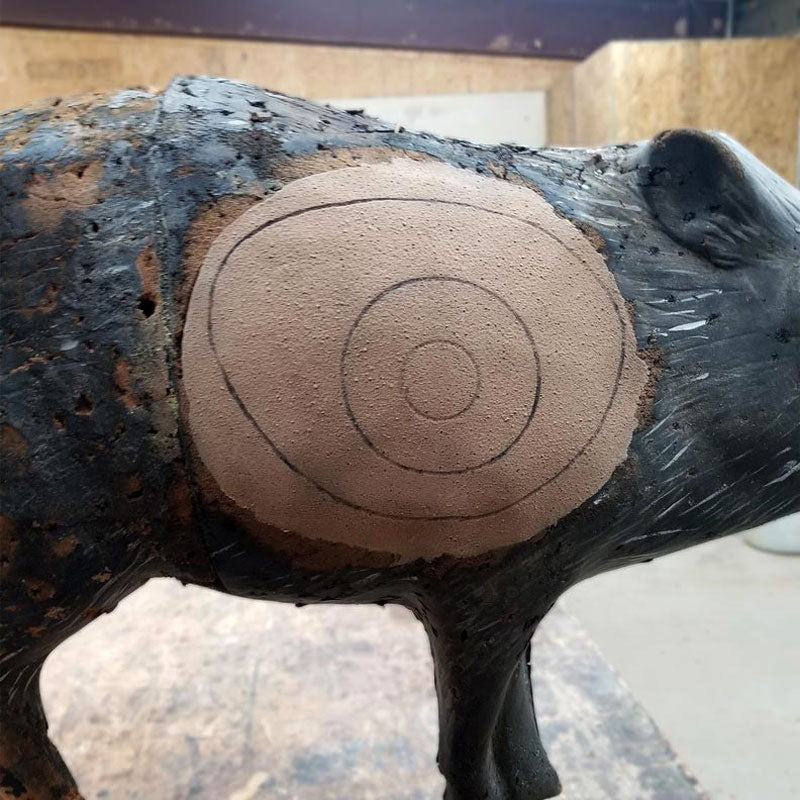
• Serrated Knife - for removing old material and trimming new foam.
• Plastic Sheeting - for creating forms around target and scoring ring template.
• Staple Gun - for attaching forms to target.
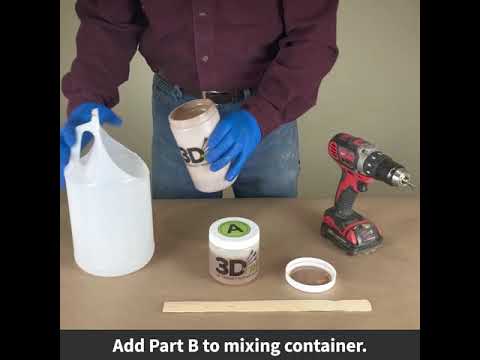
• High Speed Drill - for mixer attachment
• Paint Mixer for Drill - for mixing parts A+B.
• Gram Scale (Case Kit only) - for measuring A+B ratio.
• Mixing Container - for mixing in and pouring parts A+B.
• Safety Glasses / Disposable Gloves
Recommended Tools (Optional)
• Reciprocating Saw - for easy foam trimming and removal.
• Rotary Tool (Dremel) - to recreate scoring rings.
• 3M Scotch-Brite Pad - used with drill for easy shaping of target after repair (or use an orbital sander with very low grit paper)
• Moisture Meter - to make sure targets are dry.
• Needle Nose Pliers - for pulling staples.
• Cardboard & Duct Tape - to back plastic (only for very large pours).
• Paint Stir Sticks - helps scrape foam from mixing container into target.
What tools do I need to have for repairs?
A serrated knife, plastic sheeting, staple gun, drill, mixing container and a gram scale if using Case Kit. CLICK HERE for a detailed list and other recommended tools.
How many targets can a Case Kit repair?
This all depends on the size of repair. You can expect to get at the minimum 5 medium/large deer vitals repaired on both sides. If smaller targets or one side repairs (not shot all the way through) you could see 7 to 10+ targets repaired.
Works well. I will buy again. I have delta aim right black bear that was shot all the way through. Most of the core shot up and a bit of the bear. Hour glass shaped hole about 8”+ hole in diameter at its narrowest. Kit filled it up about perfect. Foam expanded much more than I expected. I did a couple layers of shrink wrap, stirred it for about 20 seconds, poured it in and it started expanding within 30 seconds, impressive. I didn’t wrap the shrink wrap tight enough. Should have followed the instructions and used staples to better confine it. Still was fine. Only have few arrows into it. 70# at 40 yards stops arrows no problem.
I’ve been using it for a while on multiple targets. In fact, I have a large elk target. We’ve shot it out 3 to 4 times and I repaired it with this product and it’s like new again.
Used a LOT of this to save a trashed elk target. Learned a lot about mixing times, temps, tricks during the process. But at the end of the day, saved a $2,000 3D Elk target I can now shoot the rest of my life. It was a fun, creative project, and it came out looking more realistic than new! Not like new, more realistic than new. Thanks for a great product!
Want a few tips?
1. Mix when the temps are warm. Not hot, and NOT too cold.
2. Save your old gallon and half gallon milk cartons and jugs. Use scissors to modify them, they work great as disposable mixing containers.
3. It’s ok to under-mix, and re-pour, but over mixing is a waste and a mess.
4. Longish mixing times make the foam too puffy.
5. Short mixing times make the foam less expansive, but dense. Maybe a good move in a high impact area.
6. Perfect mixing times yield a perfect amount of pour-ability and foam expansion for filling gaps. Takes some practice.
7. Don’t skimp. Have acetone handy for the mixer paddle!
8. Use disposable rubber gloves, and old clothes!
9. Use a good digital scale! No excuses, they are like $20, and every archer needs one, right?
10. Plastic drop cloth is super handy for lots of stuff, but especially getting that nice, textured hide finish on the top pour.
will order more
Target repair kit seems to be user friendly as far as mixing and using. Also stops arrows well yet it's easy enough to pull arrows


